GitHub
This guide will cover how to get started using Pakkly as quickly as possible. We assume you have an app that you serve using GitHub releases.
Adding an App
Head to the pakkly app and click on Sign In With GitHub button. Once signed in, you will be presented with a list of Apps:

If you haven't yet added any apps this list will be empty, either way proceed and click the New App button. This will open the create app screen:
Let's fill out the App name and select GitHub as the delivery network:
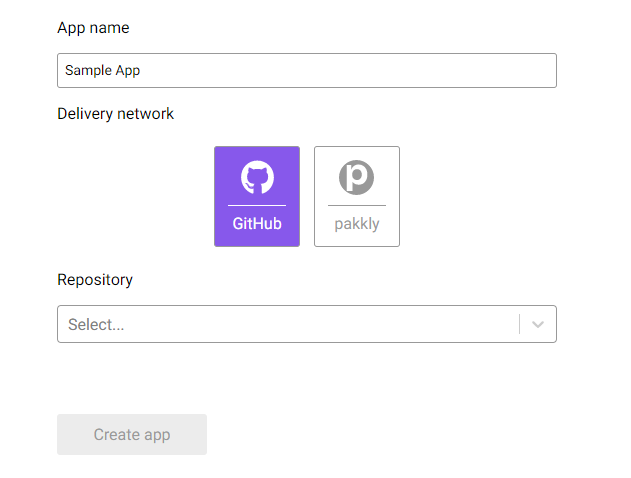
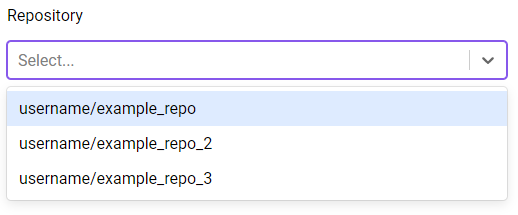
You should now select a repository from your github account to use. If you select a repository you already selected in a previous app, an error will be shown and you will be prompted to select a different repository.
Once you’ve selected a repository that will serve as the distribution point for your app and filled out the other required information click the Create app button.
Release
Pakkly works based on GitHub releases, so you will need to make a release for your app first. A guide is available on GitHub. Pre-releases are ignored by pakkly! only the last full release is used for updating.
As an example of a GitHub release let's look at Atom's latest release (at the time of writing):
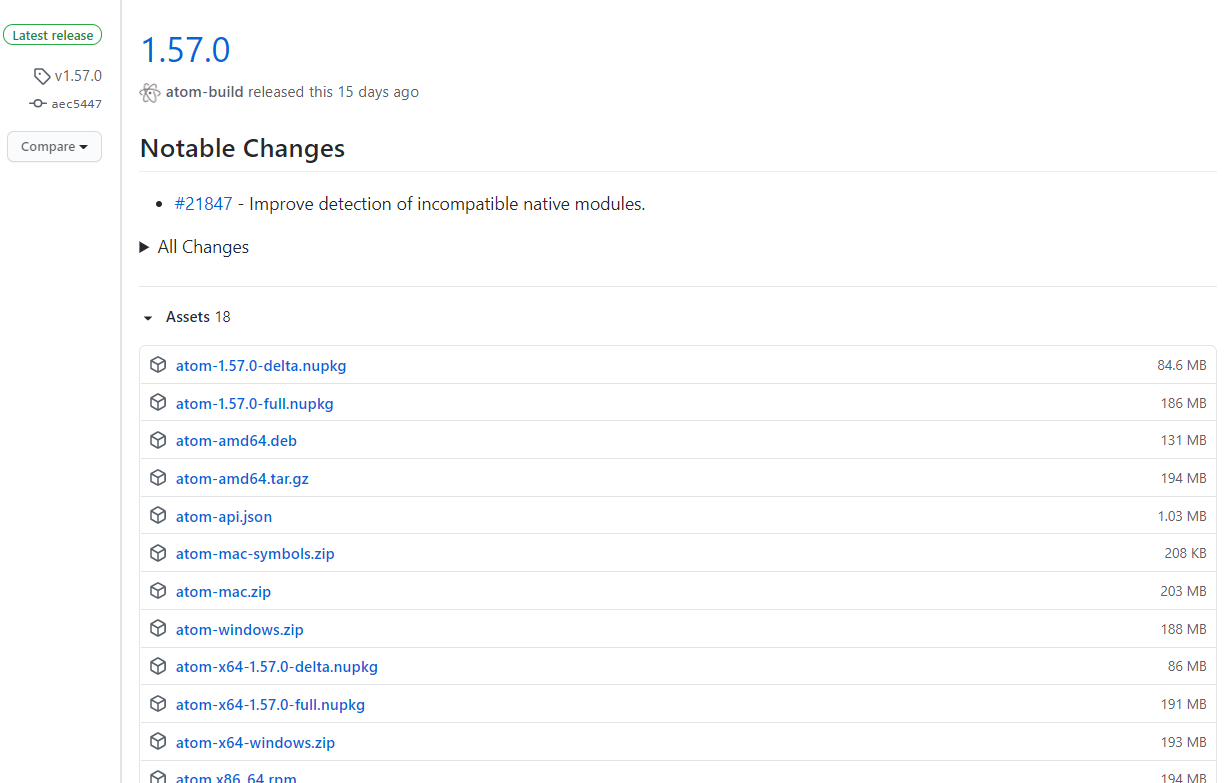
Atom has various files under the "Assets", one of them being atom-windows.zip. This is a 32-bit windows .zip which contains an atom.exe executable file.
This is the file a user would run after downloading and unzipping atom-windows.zip in order to start Atom.
You should follow a similar release structure for your own app. The requirements are:
- An asset .zip file for a desired os and architecture (e.g. atom-windows.zip for 32-bit Windows on Atom)
- The .zip asset file should contain an executable which starts your app (e.g. atom.exe for Atom).
Additionally, we recommend naming the asset files identically in every release, but this is not required due to glob support.
Setup updating
Clicking on an app in the app list will bring you to its edit sceen, where you can set up a target platform. Pakkly needs at least one platform in order to be useful!
Let's enable Windows 32-Bit:
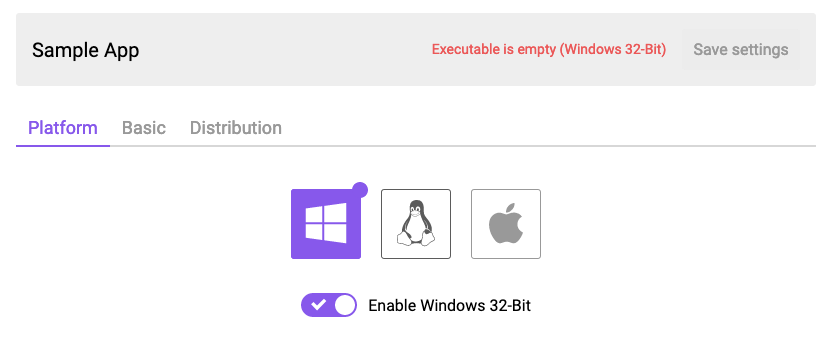
You will now see two required fields, in our example Executable you want to run should be set to atom.exe
In the previous section we explained the 2 requirements to integrate your app into Pakkly, a .zip file and an executable in that .zip file.
The Zip that contains it field should match the name of that .zip file (for whatever platform we want). For Atom on Windows 32-bit that would be atom-windows.zip, so let's use that:
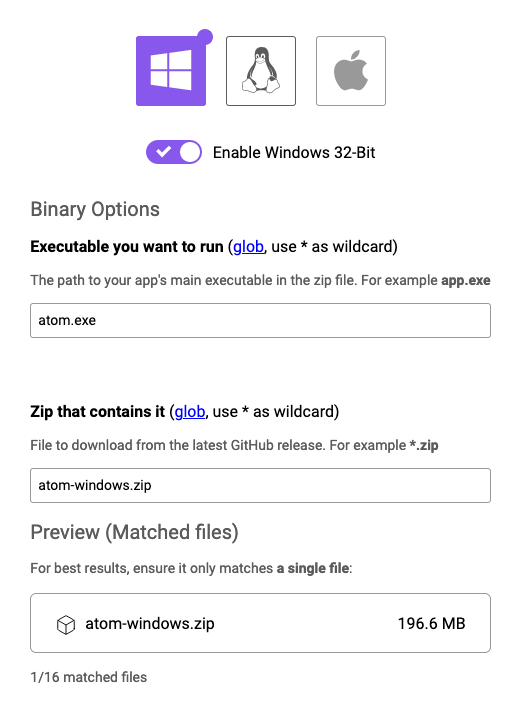
You will notice that on the Preview list of items has narrowed to match our filename input. Ideally the input should only ever match one file. This way you can be sure Pakkly will always download the correct file.
And we're done! Now we just click the Save settings button to apply our configuration.

After saving the settings you can test out the Download Hub, available in the Distribution tab. This is the link you should share to users of your app. Let's visit the link:
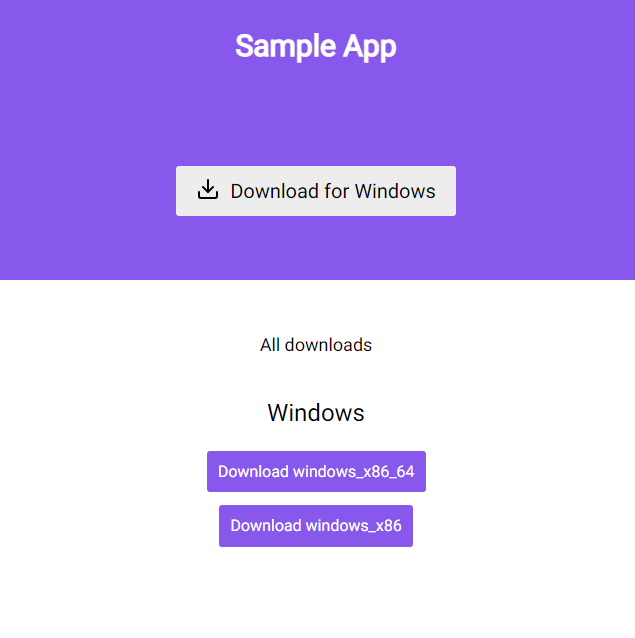
We can see all available download options (we only enabled Windows 32-bit, but this automatically works with 64-bit so that's visible too), along with a recommended download depending on the user's detected system.
New update
Now that everything is setup all you need to do is create a new GitHub release, just like normal. Pakkly will then automatically detect and update your users app to the latest release of your GitHub repo.